Technical questions for the CSDD practical driving exam
A must - know for every future driver!
If you are preparing for the CSDD Category B practical driving exam, you must know the answers to 14 technical questions that cover key knowledge about the vehicle.
Before the practical driving exam begins, you will be required to answer one of these 14 theoretical questions. If your answer is incorrect, you will still be allowed to continue with the driving exam.
However, keep in mind that a correct answer may be crucial for successfully passing the exam.
Vehicle knowledge check
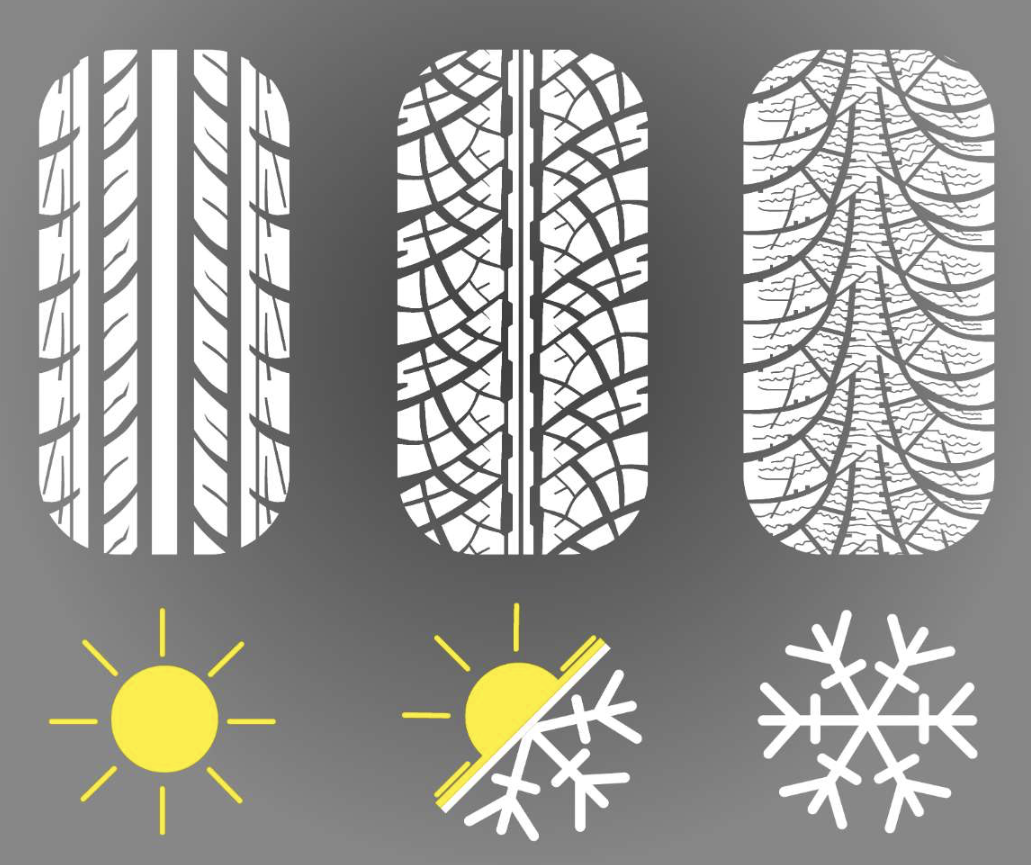
1. Determine whether the car is equipped with winter or summer tyres and explain their operating characteristics.
You can distinguish winter tyres from summer tyres by the markings or symbols on the tyre sidewall. Winter tyres must have the marking “WINTER” or a snowflake symbol, a snowman icon, or another snow-related symbol. Tyres can also be identified by the tread pattern. While summer tyres have smooth tread blocks, winter tyres feature numerous fine, saw-tooth-shaped slits (sipes) in each tread block to improve grip on the road.
The minimum tread depth in winter must be at least 4 mm, and in summer at least 1.6 mm.
If the tread depth is below the required limit, the tyre may completely lose grip, which can cause skidding and lead to an accident.
In summer, driving on worn-out tyres during rain significantly increases the risk of skidding and aquaplaning.
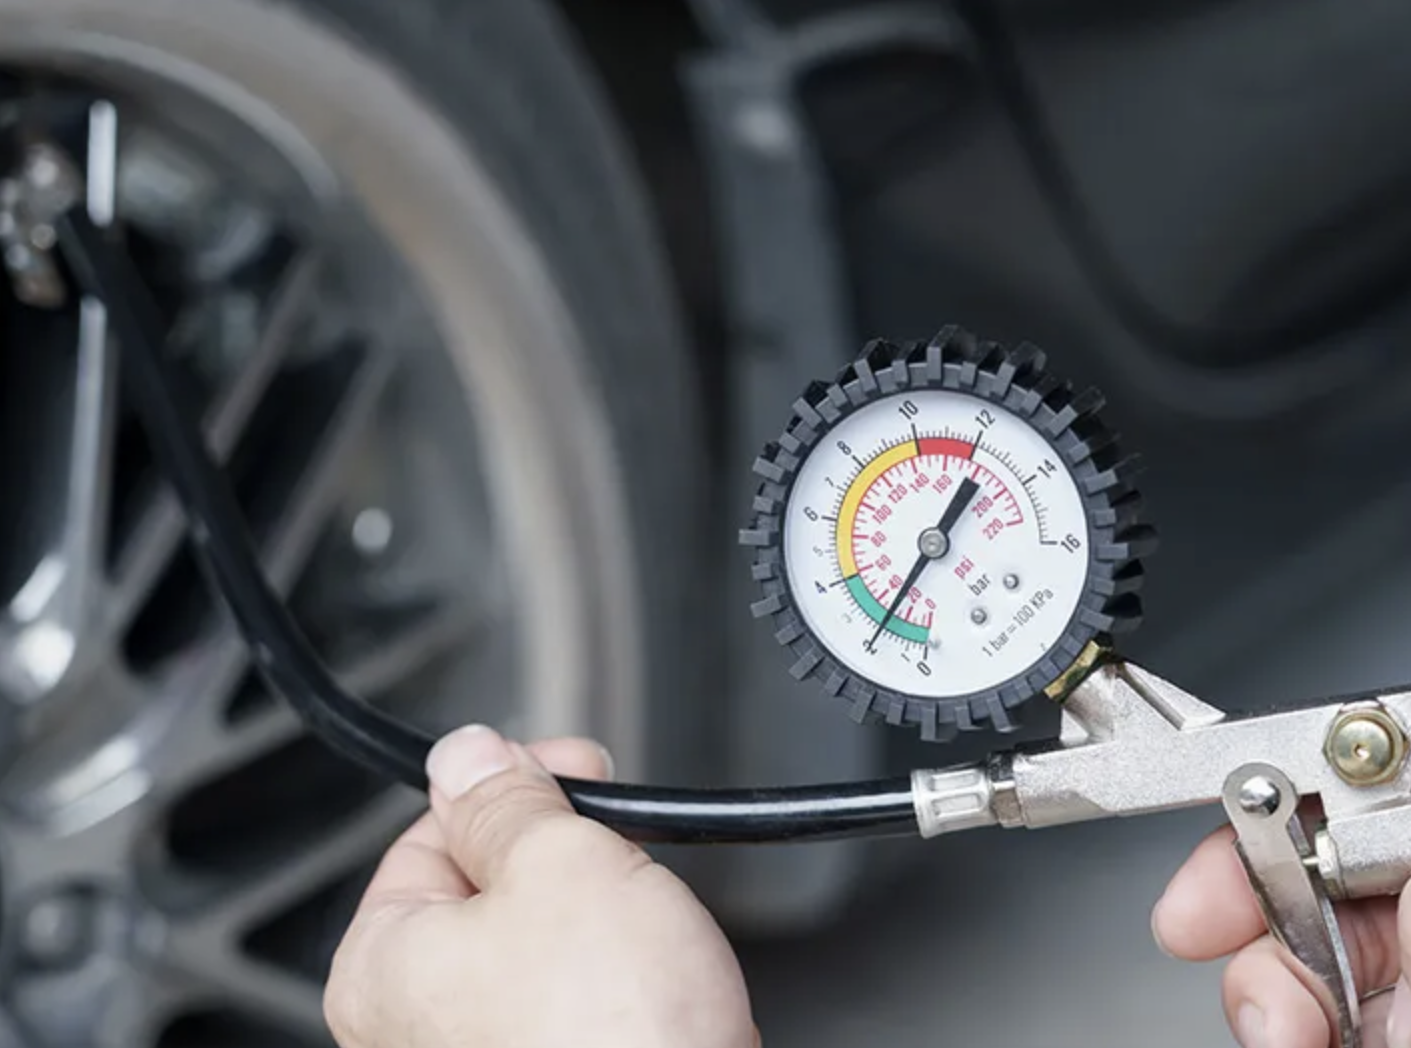
2. Explain how to check the tyre pressure and what the correct pressure should be.
Tyre pressure is measured using an air pressure gauge (manometer). For most passenger cars, the rear tyres are usually inflated to 2.0 bar, while the front tyres require about 0.2 bar more. This difference exists because the front of the vehicle is heavier due to the engine, which means the front tyres must be inflated slightly higher.
For example, if the rear tyres are inflated to 2.0 bar, the front tyres should be set to 2.2 bar.
If the tyre pressure is too high, the tyre’s contact patch with the road becomes smaller, reducing grip and increasing the risk of skidding.
If the pressure is too low, the tyre deforms, and the car may pull to the side where the pressure is lower.
Recommendation: Check the tyre pressure at least once a week. If, during your morning visual inspection, you notice that one tyre looks underinflated, check the pressure at the nearest filling station. After adjusting the pressure, make sure the valve is not leaking air.
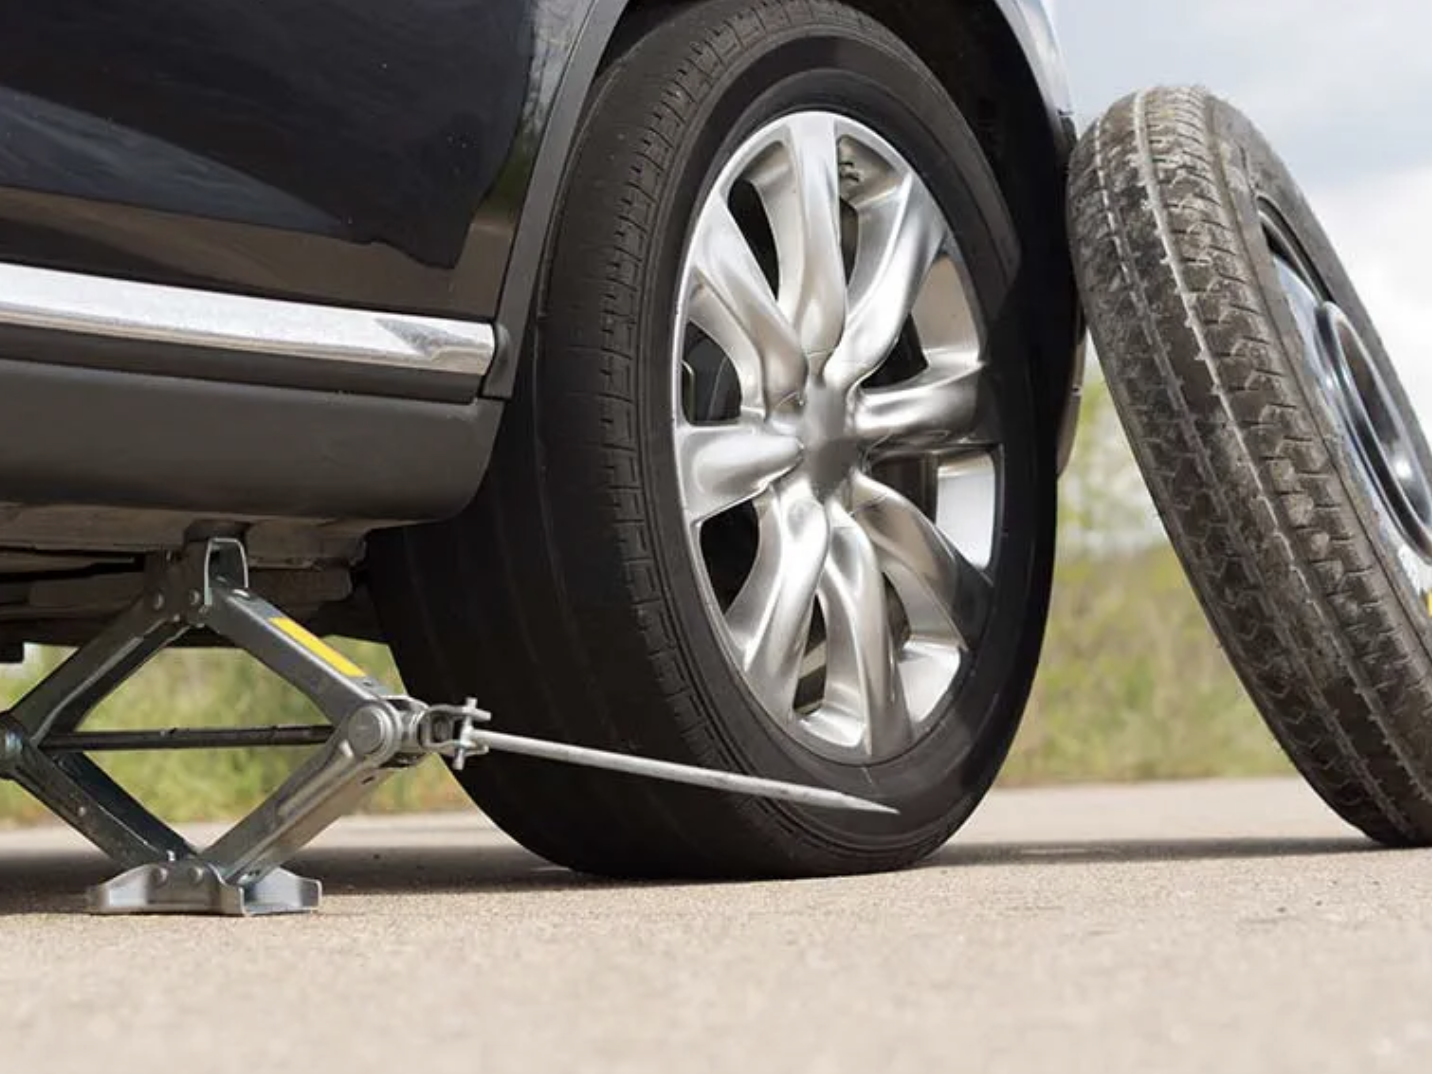
3. Explain the sequence of steps and safety measures when changing a wheel.
First, switch off the vehicle’s engine. Engage the parking brake and select 1st gear. If stopping in the chosen location is prohibited or may cause an obstruction to traffic, switch on the hazard warning lights, place a warning triangle, and put on a reflective safety vest.
Depending on which wheel needs to be replaced, place wheel chocks or stones on both sides of the diagonally opposite wheel.
For example, if you are changing the front left wheel, the chocks should be placed under the rear right wheel.
Remove the spare wheel, jack, and wheel wrench from the luggage compartment. Loosen all the wheel nuts on the wheel that needs to be replaced. Position the jack, ensuring it rests on a firm and level surface. Raise the vehicle, unscrew the nuts completely, and remove the wheel.
Fit the spare wheel and hand-tighten the wheel nuts. Lower the vehicle and then fully tighten the nuts securely. Place the damaged wheel and tools back into the luggage compartment. Switch off the hazard warning lights and remove the warning triangle.
Recommendation: When tightening wheel nuts, always do so in a diagonal (cross) pattern to ensure the wheel seats correctly. After driving 20–30 kilometres following a wheel change, including one performed at a service centre - check whether any of the wheel nuts have become loose.
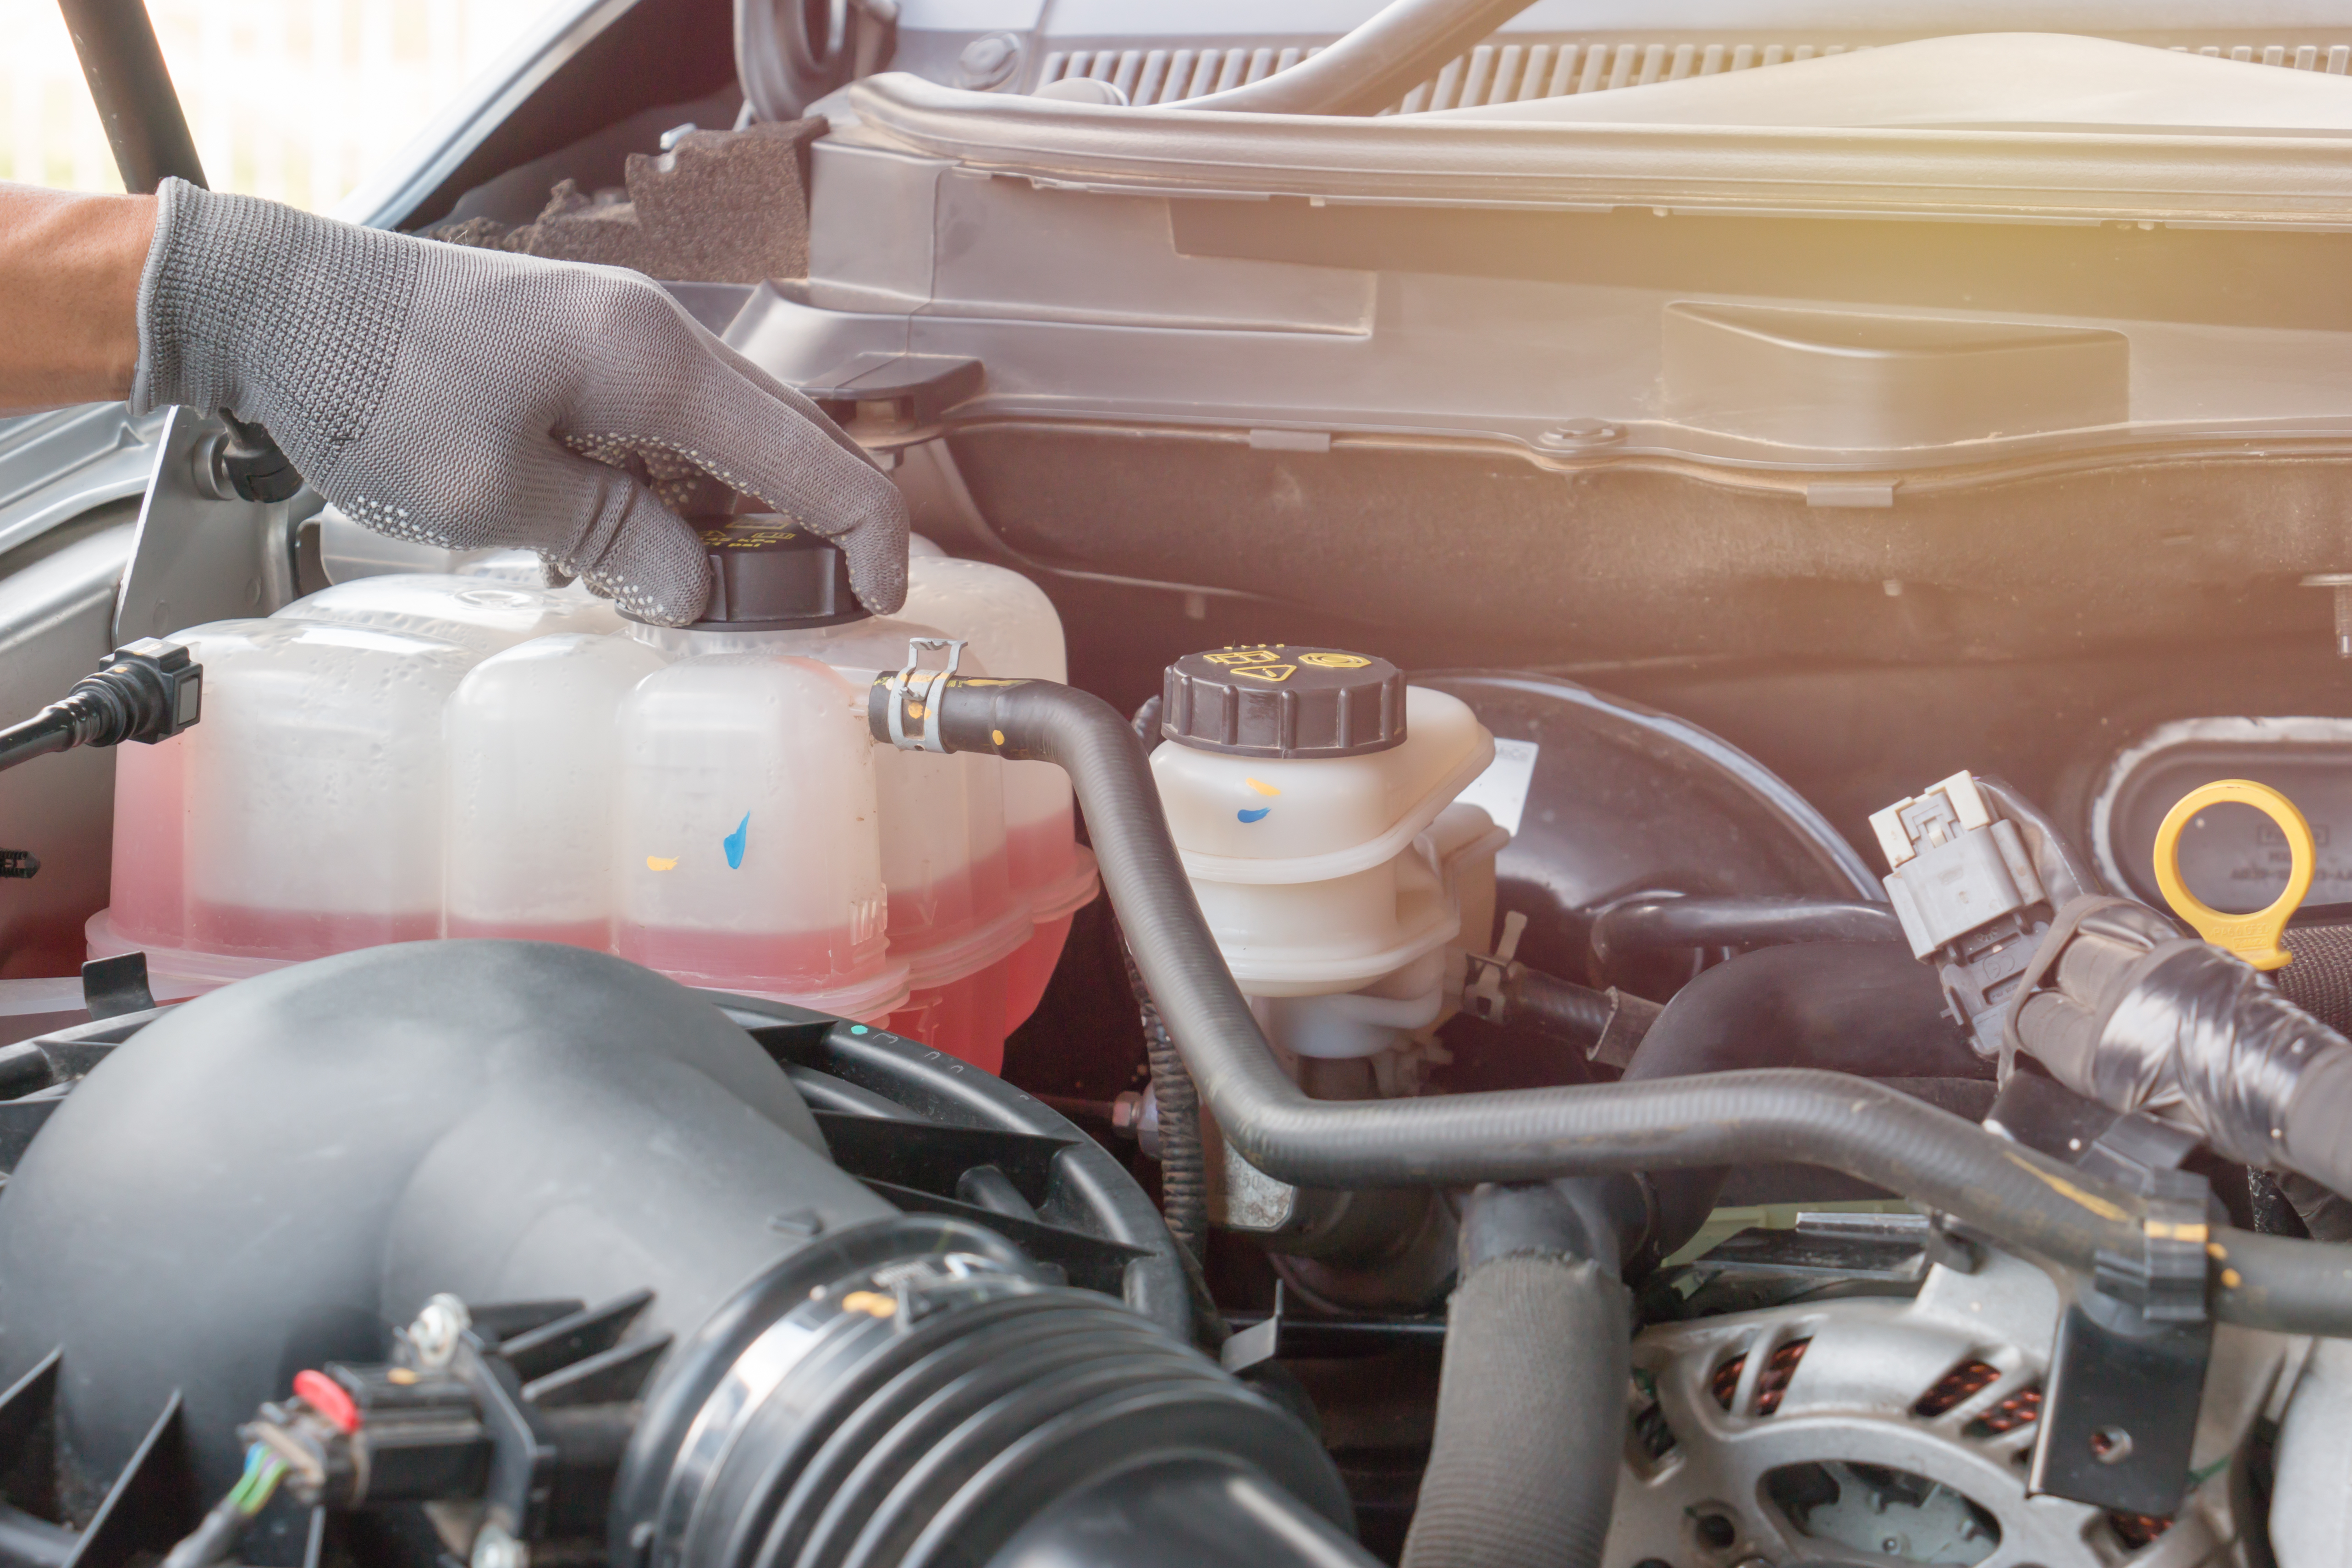
4. Explain how to check and top up the coolant level in the cooling system.
Open the engine hood. At the front of the engine compartment is the radiator, which contains the engine coolant. During driving, the coolant circulates and prevents the engine from overheating. If the coolant level becomes too low, a warning symbol will appear on the vehicle’s dashboard, alerting the driver that the coolant needs to be topped up.
If the radiator is equipped with an expansion tank, it will have maximum and minimum level markings the coolant must be within this range.
If there is no expansion tank, the coolant level should be approximately 10 mm above the radiator tubes. To check this, proceed with caution: slowly unscrew the radiator cap (preferably using a glove or cloth), check the coolant level, and top it up if necessary. The radiator is filled with coolant/antifreeze.
Recommendation:
Never attempt to open the radiator cap immediately after switching off the engine. Wait at least 10–15 minutes. Open the cap carefully, as hot steam may escape and cause burns.
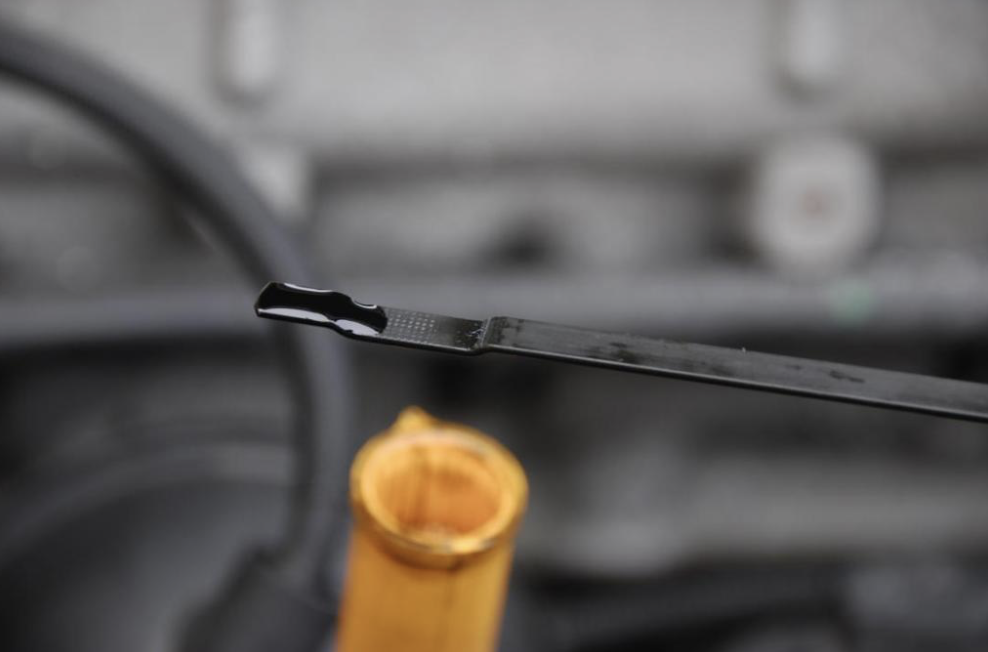
5. Explain how to check the engine oil level in the oil sump.
Open the engine hood. Remove the dipstick and wipe it clean with a cloth or paper towel. On the lower part of the dipstick, there are two markings indicating the minimum and maximum oil levels. Insert the dipstick back into place fully, then remove it again. Check whether the oil level is above the minimum mark.
If the oil level is outside the recommended range, it must be topped up.
On the engine block, there is a screw cap marked with an oil can symbol. Unscrew this cap and pour in engine oil until the correct level is reached on the dipstick. Engine oil should be changed every 15,000 kilometres.
Recommendation:
Before adding oil, always make sure you know the specific type and viscosity required for your vehicle. You can find this information in the vehicle’s manual or by asking at any automotive service centre.
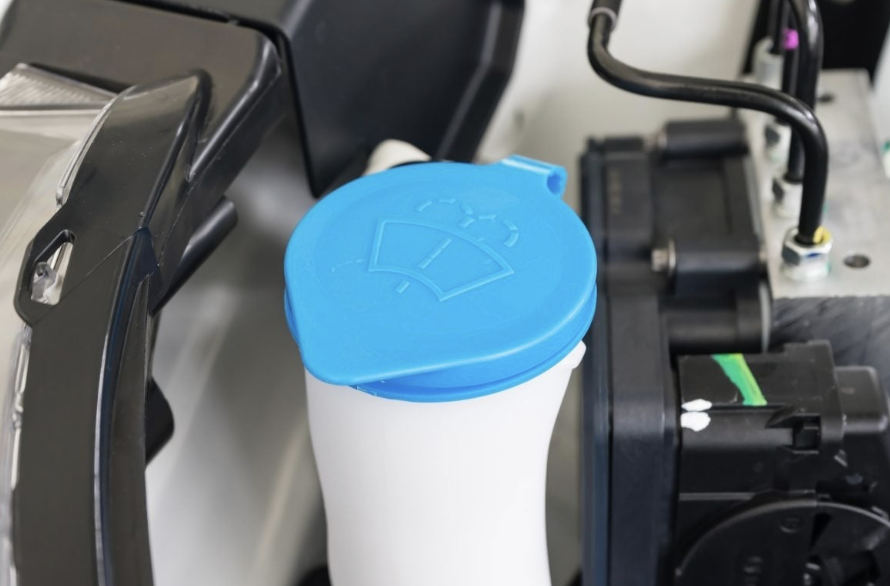
6. Check the washer fluid level and operate the windscreen wipers in different modes.
A warning light on the vehicle’s dashboard usually indicates that the washer fluid level is low. Open the engine hood and locate the windscreen washer fluid reservoir. The reservoir cap typically has a symbol or label showing that it is intended for washer fluid. Open the cap and fill the reservoir with windscreen washer fluid.
After topping up, switch on the windscreen wipers and test them in different modes, starting with the lowest speed setting.
Recommendation:
Many drivers use plain water for windscreen cleaning during summer. This is acceptable, but before the first frost, the water must be replaced with winter-grade, frost-resistant washer fluid. Otherwise, the water in the reservoir may freeze, potentially damaging the washer fluid tank or the pump.
7. Switch on the external lighting devices or the hazard warning lights.
To check the reverse lights or brake lights, you can ask another person for assistance or reverse the car up to a reflective surface, such as garage doors. When you press the brake pedal, the reflection on the doors will show whether all the brake lights are functioning.
Recommendation:
If you notice that the turn signal on one side flashes significantly faster than on the other, check whether one of the indicator bulbs has burned out.

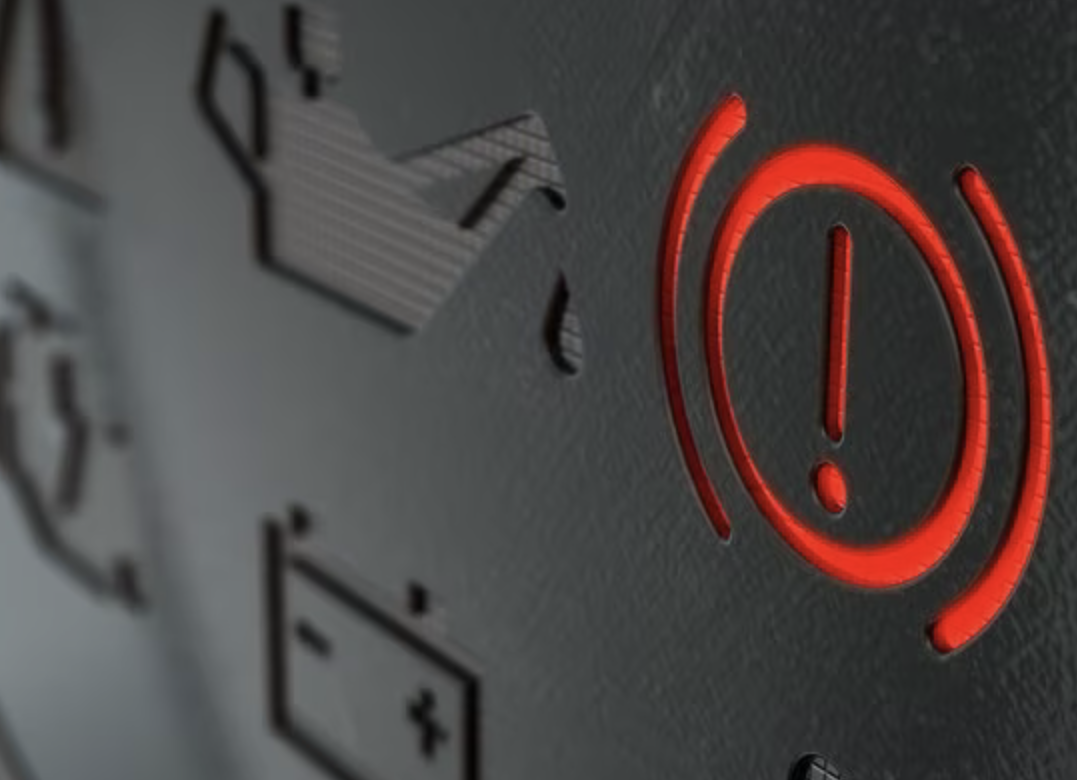
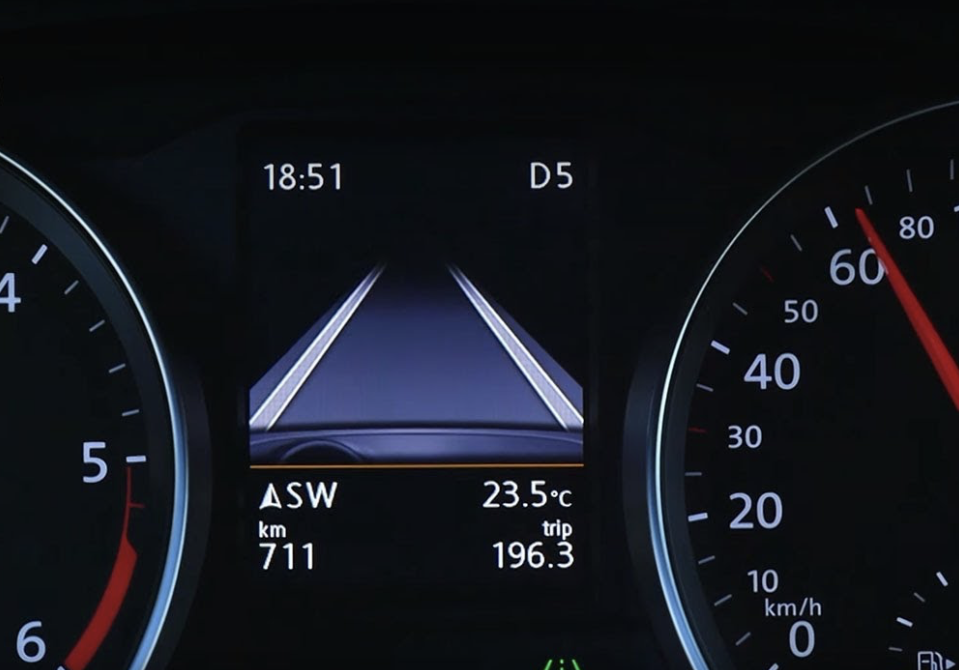
8. Explain the functions of the instruments and warning lights on the dashboard.
Speedometer – shows the vehicle’s speed in km/h.
Tachometer – shows the engine’s revolutions per minute (for example, if the needle points to 2, the engine is running at 2000 rpm).
Odometer – displays the total distance driven.
A blue warning light indicates that the high-beam headlights are switched on.
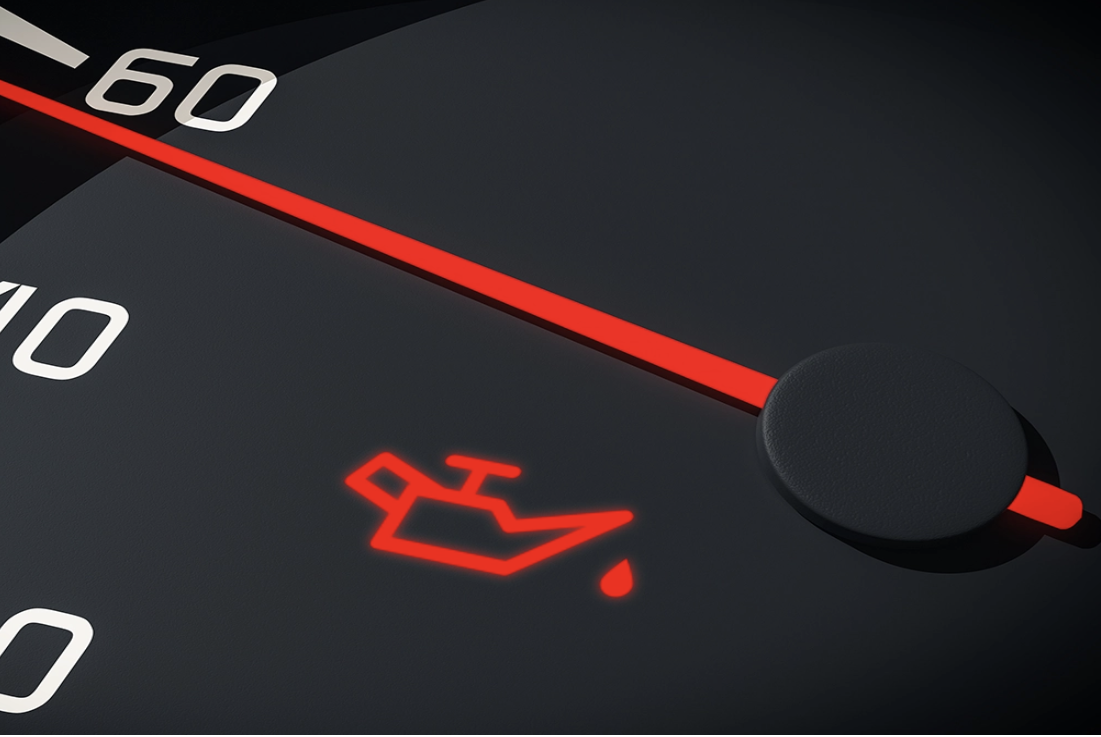
If an orange or yellow warning light appears while driving, it indicates that something may be wrong with the vehicle and the cause should be checked as soon as possible.
If a red warning light illuminates while the vehicle is in motion, it signals a serious technical fault, and driving must not be continued. The vehicle should be stopped immediately, the engine switched off, and the cause of the warning light identified.
Example:
If the engine oil level is low, an orange oil can symbol will appear on the dashboard, informing the driver that the engine oil needs to be topped up.
If the driver ignores this warning and continues driving, a red oil can symbol will eventually appear, indicating that the oil level is critically low. Ignoring this warning can lead to severe engine damage, and repairs may cost several hundred euros.
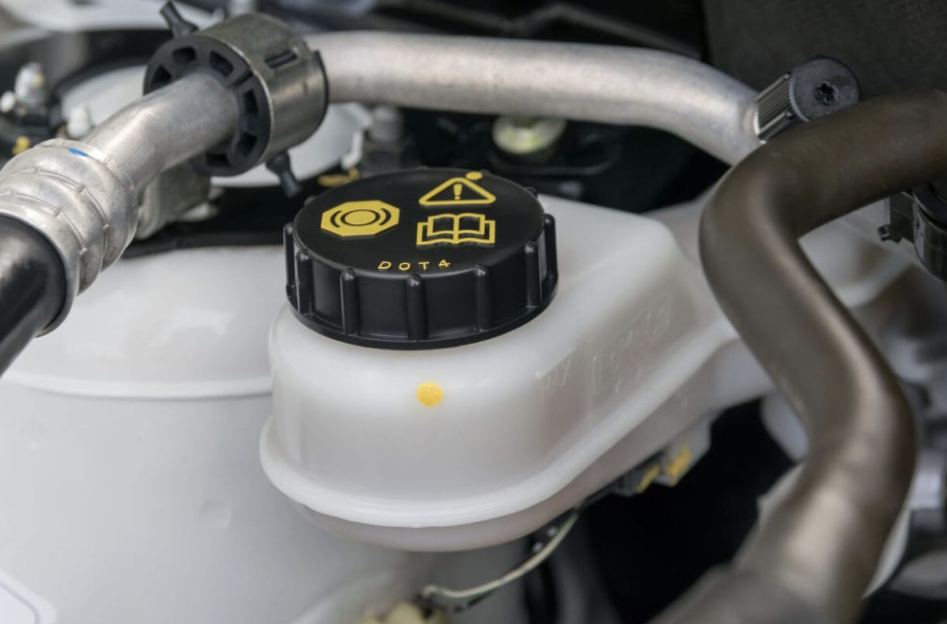
9. Explain how to check and top up the brake fluid level.
Open the engine hood. The brake fluid reservoir is almost always located directly in front of the brake pedal area (on the driver’s side of the engine bay). The reservoir has maximum and minimum level markings, and the brake fluid level must be between them.
If the level is below the required minimum, open the reservoir cap and top up the fluid using the same type of brake fluidspecified in the vehicle’s documentation.
Recommendation:
If the brake warning light on the dashboard flashes periodically while driving and braking, check the brake fluid level immediately.
If the level is within the normal range, the issue may be worn brake pads, which need replacement.
Continuing to drive with worn pads will cause them to wear out completely, potentially resulting in damage to the brake discs.
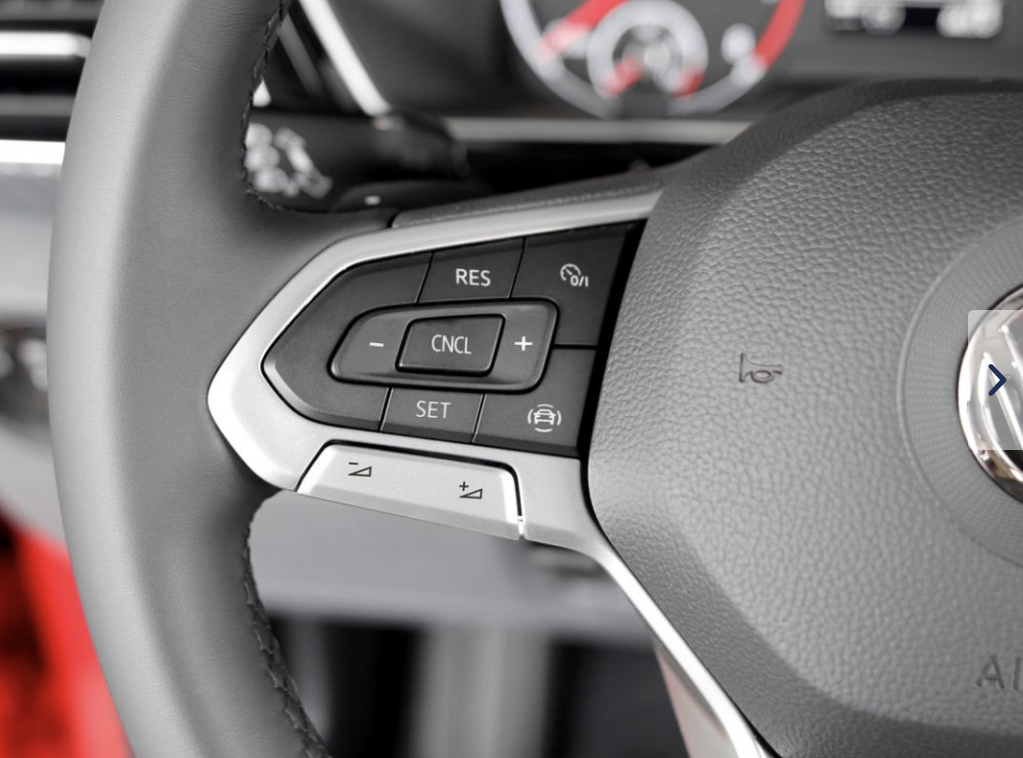
10. Explain the purpose and benefits of cruise control, the main differences between standard cruise control and adaptive cruise control, and the key risks associated with using them.
Vehicles equipped with cruise control allow the driver to set a desired speed, which the system then maintains automatically (the driver does not need to press the accelerator pedal).
The main difference between standard cruise control and adaptive cruise control is that adaptive cruise control automatically reduces the vehicle’s speed if the vehicle ahead slows down, and then accelerates back to the preset speed once the road ahead is clear and the leading vehicle speeds up again.
On long journeys, cruise control is an invaluable aid to the driver: there is no need to constantly monitor the speedometer, the driver’s legs remain relaxed, and even after a long trip, fatigue is significantly reduced.
The main risk when using cruise control is that it can reduce the driver’s alertness, which can increase reaction time in emergency situations. Adaptive cruise control also carries the same risk if the system handles too much of the driving task, the driver may become less attentive to the road environment.
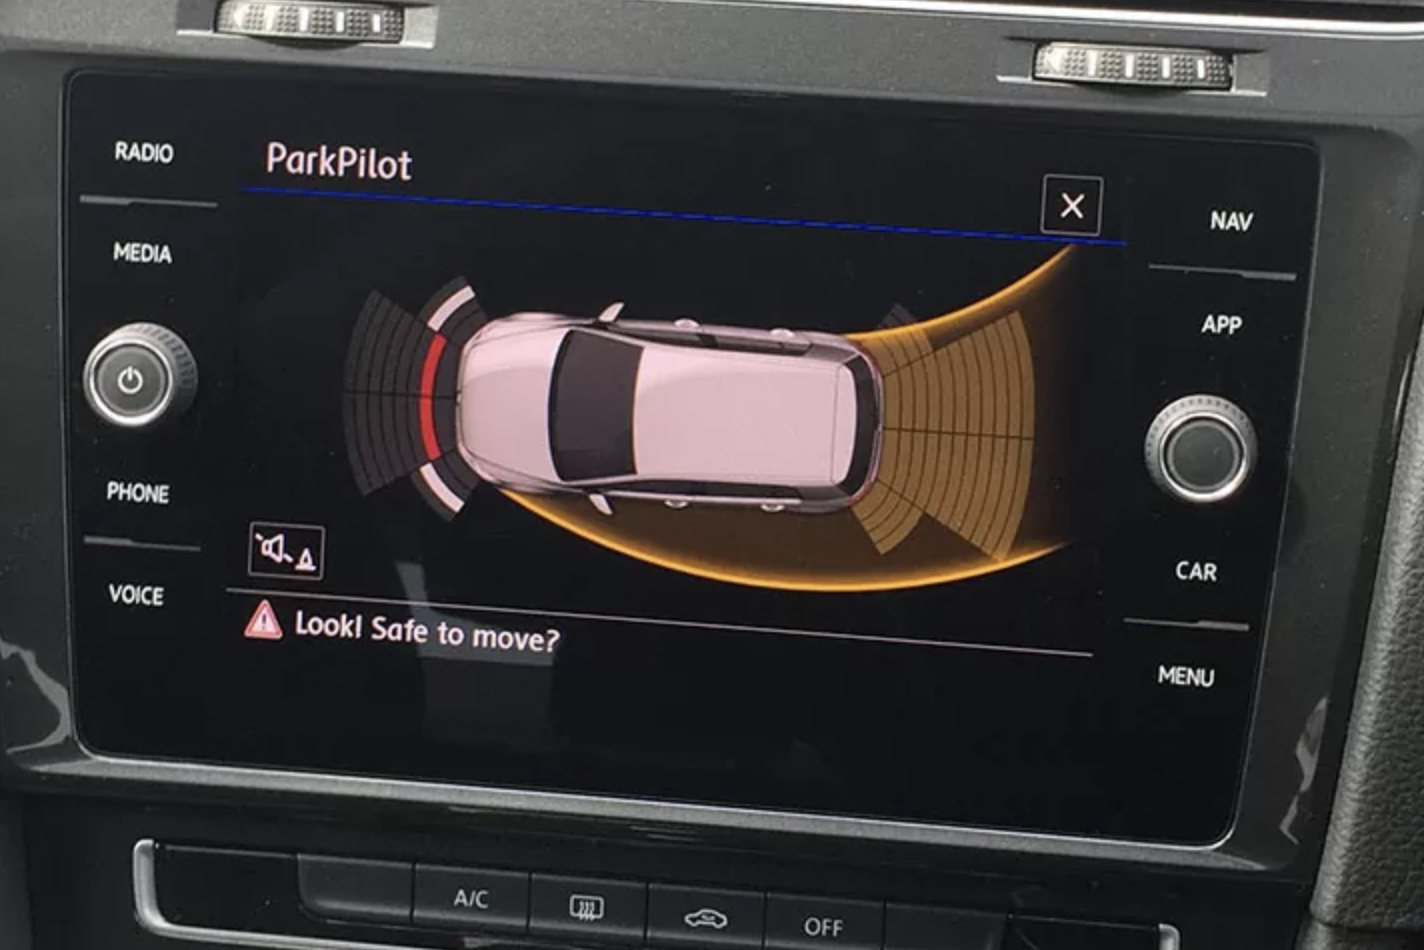
11. Distance sensors and their operating principles.
Distance sensors help the driver determine how close the vehicle is to an obstacle when parking. An acoustic warning signal indicates how near the vehicle is to another car or object. These sensors measure the distance to the nearest obstacle either in front of or behind the vehicle.
As the vehicle approaches an obstacle, the warning tone begins to sound, and the frequency of the beeps increases. When the vehicle is approximately 30 cm away from the obstacle, the warning signal becomes continuous. Distance sensors are typically integrated into the vehicle’s front or rear bumper.
12. Collision warning system and automatic emergency braking system – operating principles.
If the vehicle is equipped with a collision warning system, the onboard computer will issue an audible alert and display a visual warning (such as BRAKE) when the vehicle approaches an obstacle too closely.
The driver must apply the brakes themselves.
In contrast, if the vehicle is equipped with an automatic emergency braking (AEB) system, the vehicle will apply the brakes automatically when a dangerous situation is detected and the driver fails to react in time.
13. Lane assist and blind spot sensors - operating principles.
The lane assist system warns the driver with an audible signal and visual indicators on the display when the vehicle unintentionally drifts toward or crosses a lane marking (for example, due to inattention or drowsiness).
All vehicles have blind spots in their mirrors. When another road user is present in your vehicle’s blind spot, a red or orange warning light illuminates in the corresponding mirror, alerting the driver to the presence of another vehicle.
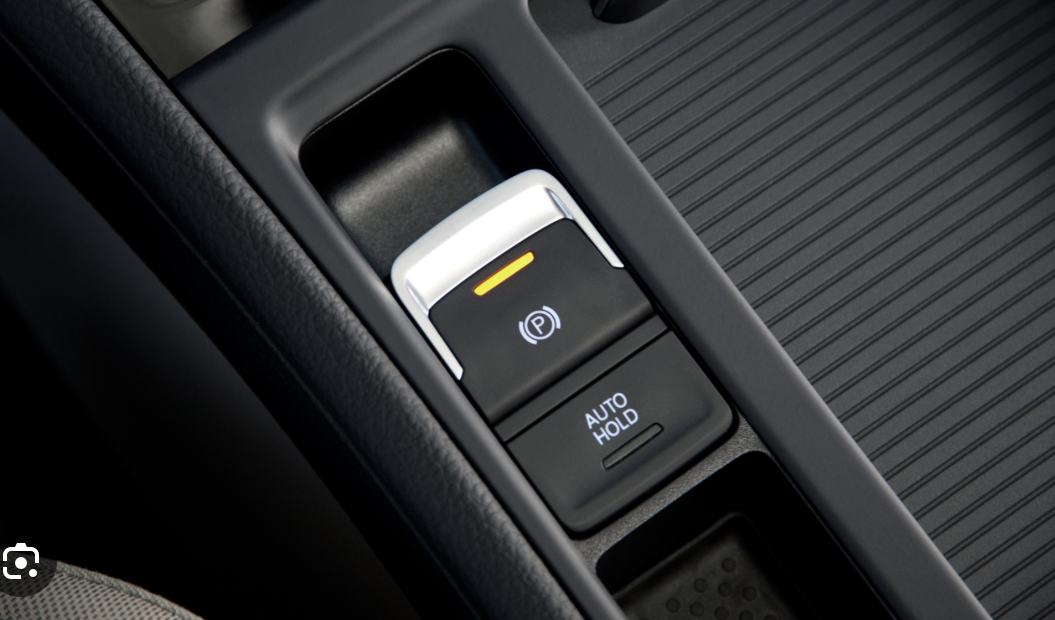
14. Explain what types of brakes your car is equipped with.
A vehicle is equipped with two main braking systems:
- Service brake (foot brake) – the primary braking system used to slow down or stop the vehicle while driving.
- Parking brake (handbrake) – used to keep the vehicle stationary when parked.